Grab your stationery essentials at discounts!

How Lead Pencils Are Made in a Factory
In this blog you learned about lead pencil making procces
8/23/20252 min read
How Lead Pencils Are Made in a Factory
Pencils are one of the most common tools in our daily lives, used by students, artists, architects, and professionals. But have you ever wondered how these simple yet essential tools are made? The pencil-making process is both fascinating and precise. In this blog, we’ll take you inside the factory to understand how lead pencils are made step by step.
1. Understanding the “Lead” in Pencils
Despite the name, pencils don’t actually contain lead. The core of a pencil is made of graphite mixed with clay, not lead metal. This mixture gives the pencil its writing ability and makes it safe to use.
2. Preparing the Graphite Core
The first step in pencil production is making the writing core:
Graphite Powder is blended with finely ground clay.
The ratio of clay and graphite determines the hardness or softness of the pencil (e.g., HB, 2B, 4H).
The mixture is turned into a thick paste with the help of water.
This paste is pressed through machines into thin, rod-like shapes known as “leads”.
These rods are then dried and baked in special ovens to harden them.
3. Shaping the Wooden Slats
Pencils are usually made from soft woods like cedar, which are easy to cut and sharpen. The process involves:
Cutting logs into thin sheets of wood, called slats.
Grooves are carved into the slats where the graphite rods will be placed.
4. Sandwiching the Graphite
Once the slats are grooved, the next step is assembling:
A layer of glue is applied inside the grooves.
Graphite leads are carefully placed into each groove.
Another wooden slat is glued on top, creating a “sandwich” of wood and graphite.
The sandwich is then pressed tightly and left to dry.
5. Shaping the Pencil
After drying, the wooden sandwiches are cut into individual pencils. They go through machines that:
Shape them into hexagonal, round, or triangular designs for easy gripping.
Smoothen the surface through sanding and polishing.
6. Painting and Branding
To make pencils attractive and durable, they are painted in several coats:
A primer coat is applied first.
Multiple layers of colored paint are added.
Finally, brand names, hardness grades (HB, 2B, etc.), and logos are stamped on each pencil.
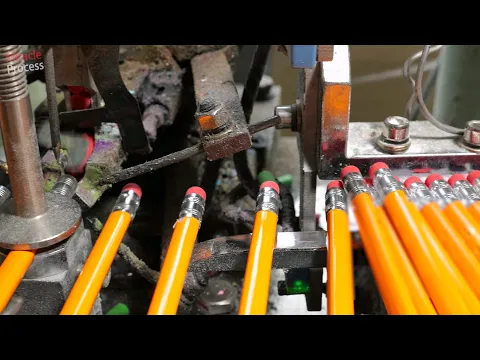
7. Adding the Eraser (Optional)
Some pencils are fitted with erasers at the end. This is done by:
Attaching a small metal ferrule (the ring that holds the eraser).
Pressing an eraser into the ferrule tightly.
8. Final Inspection and Packaging
Before pencils reach the market:
They undergo quality checks for strength, writing smoothness, and finish.
Faulty pencils are removed.
The finished pencils are then sharpened (in some factories) and packed into boxes, ready to be shipped worldwide.
Conclusion
The journey of a pencil—from graphite and wood to the polished tool we use every day—is a perfect example of how natural resources and technology come together. Although small and simple, the pencil remains one of the most powerful tools of human creativity and learning.